Today’s blog post is a Panasonic bread maker review as I share how I make fresh bread everyday. I know, I know. I didn’t think I’d be this person either! No one is more surprised than I am that I make a fresh loaf of bread most days.
We bought our Panasonic bread maker two years ago. I was hesitant about getting a bread maker as it seemed like another expensive kitchen gadget that would clutter up our cupboards once the novelty wore off.
I asked the lovely people of Instagram what they thought and it was a 50/50 split. Some people said they loved their bread makers and used them daily, while other people agreed that they rarely used it once the initial excitement was gone.
It was Sam who was the driving force behind the decision to get a bread maker and, would you believe, he’s the one who grew bored of it and hasn’t used it in over a year!
For me however, I LOVE it. It isn’t perfect but I wouldn’t be without it and I’m so happy we bought it.
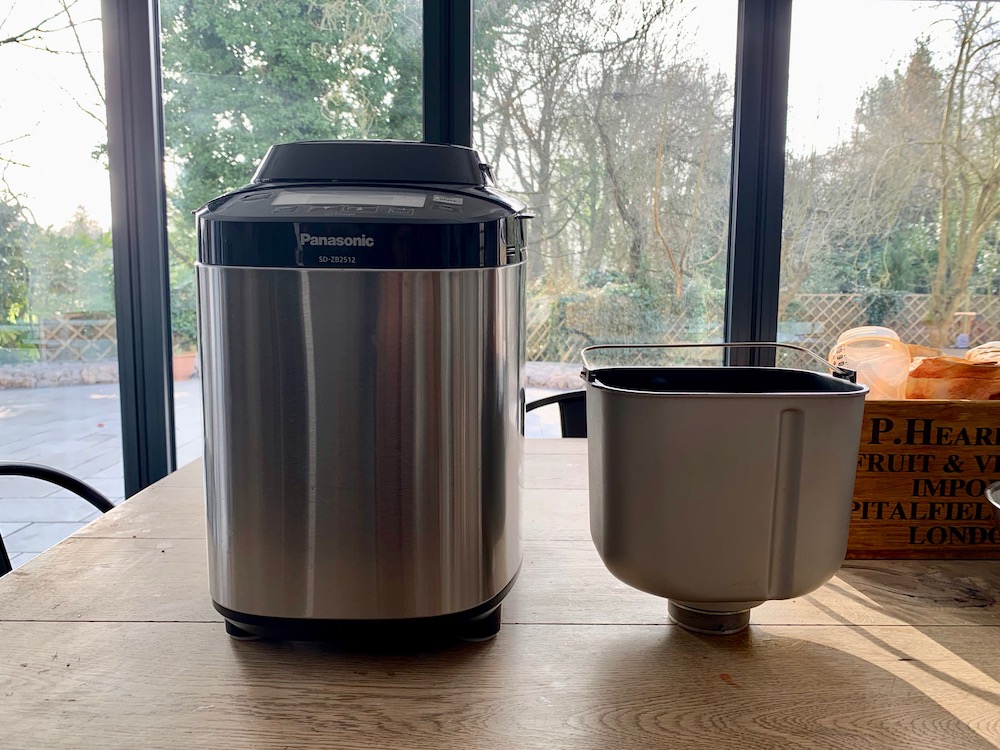
The Panasonic SD-ZB2512KXC
I really don’t know why Panasonic don’t give their breadmakers catchier names!
We opted for a Panasonic bread maker. After reading online reviews we saw that other brands of bread makers could be unreliable and broke quickly. To be honest, so can Panasonic bread makers (as you’ll see from my review below) so we bought ours in store from John Lewis as they’re always great when it comes to returns and fixing faulty items. Amazon are good with returns too but I like the ease of being able to drop it off at John Lewis rather than arranging packaging and delivery.
I’ve linked to it here on Amazon where it is £30 cheaper than John Lewis. I think John Lewis will price match but it’s interesting to look at all the reviews on Amazon (currently over 2,000 reviews and 89% are 5*)
The more up-to-date version of our Panasonic bread maker is still very similar but has a horizontal design. This is a much better design as it fits on the kitchen worktop and can be neatly pressed against the wall when not in use!
Other than the new horizontal design, it looks almost exactly the same to the one I have.

- DUAL TEMPERATURE SENSORS: This breadmaker comes equipped with two built-in sensors to determine both internal and external temperatures to optimise each programme at every step, giving you the best...
- ARTISAN-STYLE KNEADING: This automatic breadmaker features an innovative kneading blade with specially placed ribs in the bread pan to replicate artisan kneading and serve you the best-tasting bread...
- FULLY AUTOMATIC: This breadmaker has both yeast and raisin/nut dispensers, which automatically add the ingredients at the right time, giving you consistently tasty bread with less work.
The size
The bread maker is much bigger than I thought it would be so this is definitely something to consider when buying one. We initially kept it out on the worktop but it’s not the prettiest kitchen appliance so I reshuffled our kitchen cupboards and made space for it in a cupboard. This works for us but it’s a big appliance to store away each day. The ideal place for it would be a utility room if you have one!
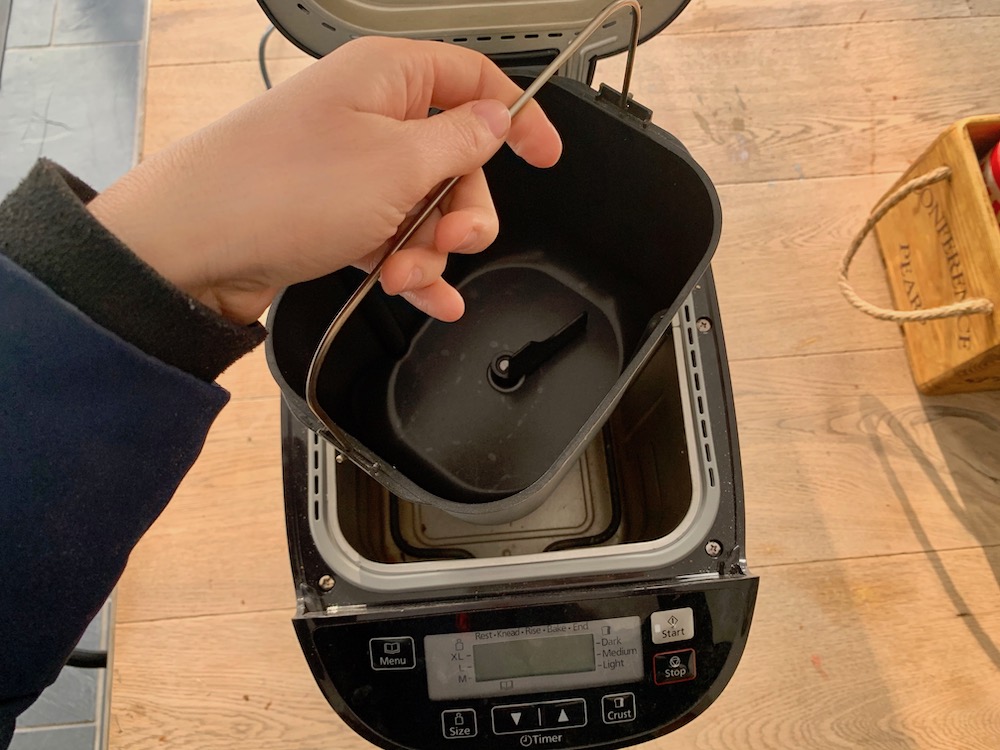
The bread maker is so easy to use
- You just add your ingredients to the basin which then sits inside the bread maker.
- You add your yeast separately into the top and the machine dispenses it slowly at the perfect time.
- Select the size you’re making
- Select how crusty you’d like your loaf to be
- Press start or select timed delay (perfect for setting the night before and waking up to fresh bread!)
- A medium sized loaf takes 4 hours from start to finish
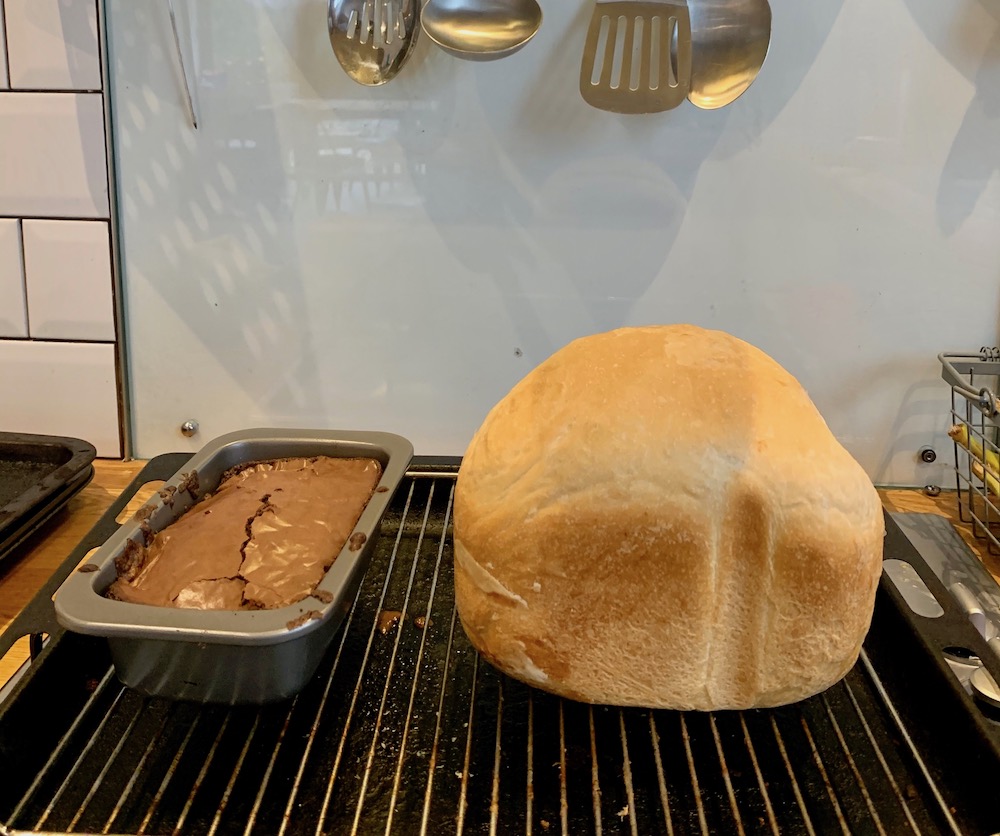
- I usually set it to just make the dough (2 hours 20 minutes) and then I leave it to prove and put it into my own tins (more on this below!)
Our bread maker bread recipe
The Panasonic SD-ZB2512 bread maker came with an instruction booklet with loads of recipes. We still use the ‘basic bread’ recipe from the book.
For a medium loaf we add:
- 400g strong white bread flour
- 1 x teaspoon sugar
- 1 x teaspoon salt
- 15g unsalted butter (vegan butter works fine too)
- 280ml water
- ¾ teaspoon of yeast

Mama Hack Tip
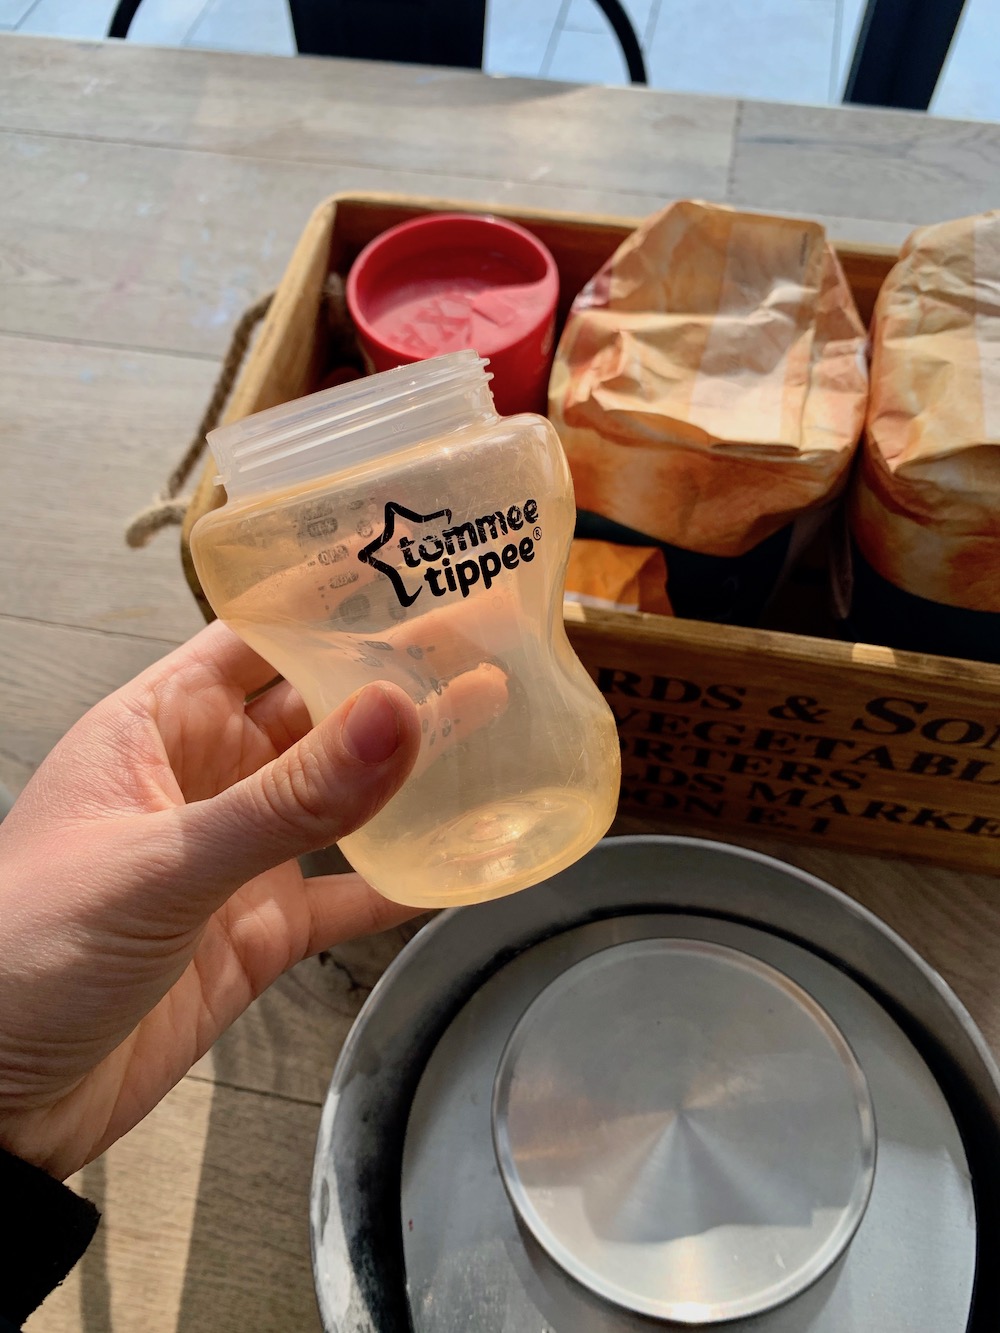
If you’ve got a baby, it’s worth noting that 280ml is the exact size of a Tommee Tippee bottle! I don’t think you need to be really precise with your ingredients measurements but if you’ve got a bottle kicking around the house then it’s worth keeping as a really easy way to measure your water!
Tips to speed up using the Panasonic Bread Maker
As you can see, using a bread maker is so quick and easy but I do have an extra tip to make it even faster.
I recommend keeping all your bread making ingredients together in a box with your scales. It just speeds things up when it’s all together. I used to keep my ingredients in different cupboards around the kitchen – salt with my spices and sugar with my tea and coffee and flour with my baking supplies and my measuring spoon, well God only knew where my measuring spoon was! Now it’s all together it feels like even less of a faff.
Using your bread maker to just make dough
This is something I often do because I like to make two mini loaves of bread (and also because I think my bread maker is faulty – more on that below).
I make my dough in the bread maker but I don’t leave it in to rise and bake. My bread maker has a setting to just make dough and I assume most bread makers will be the same.
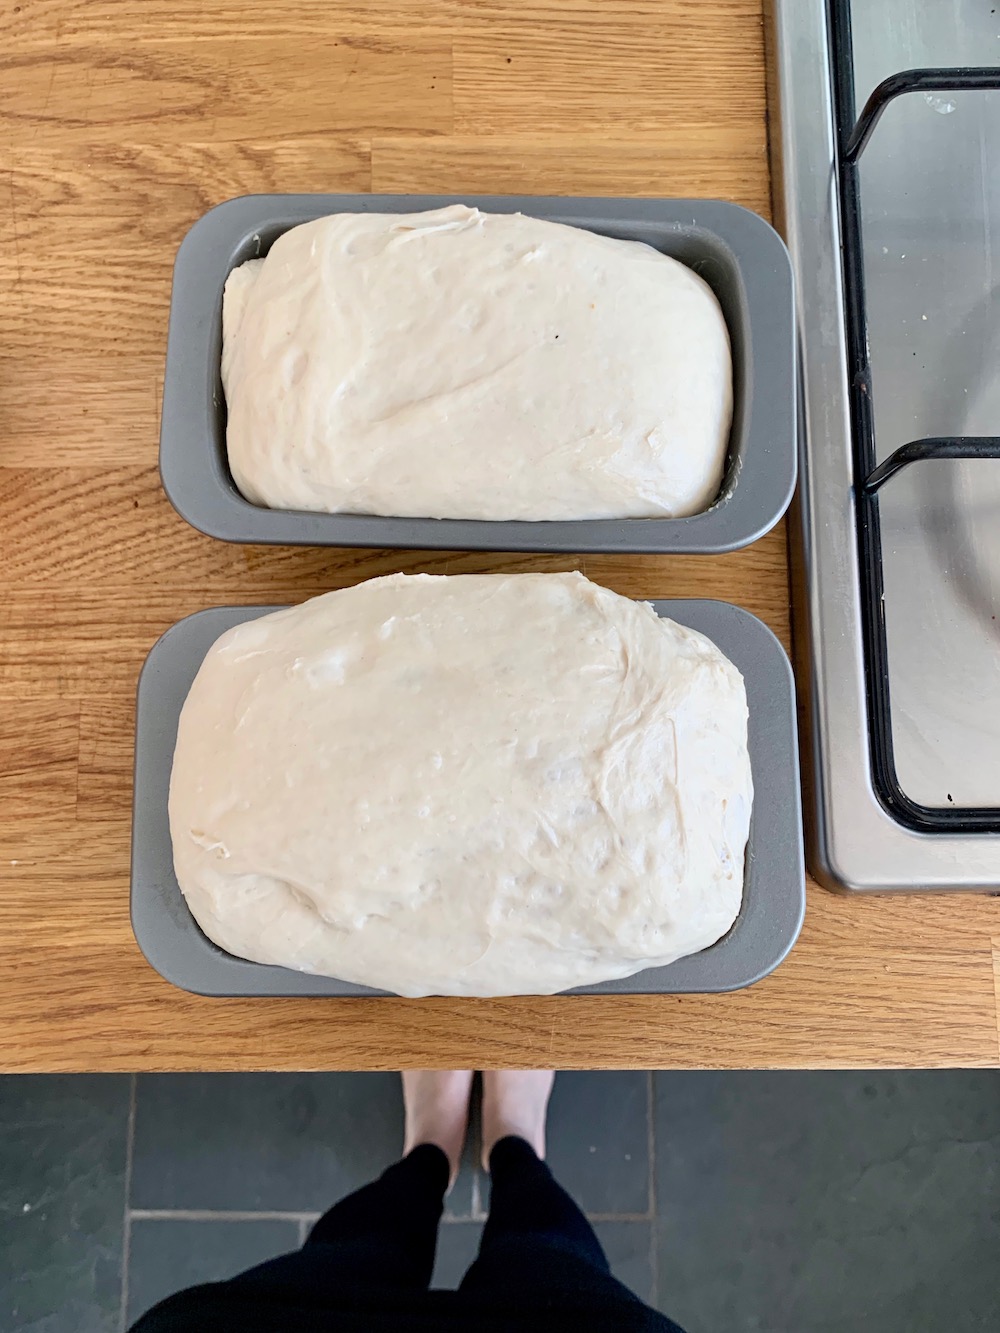
I then remove it and cut the dough in half and place it into two small loaf tins.
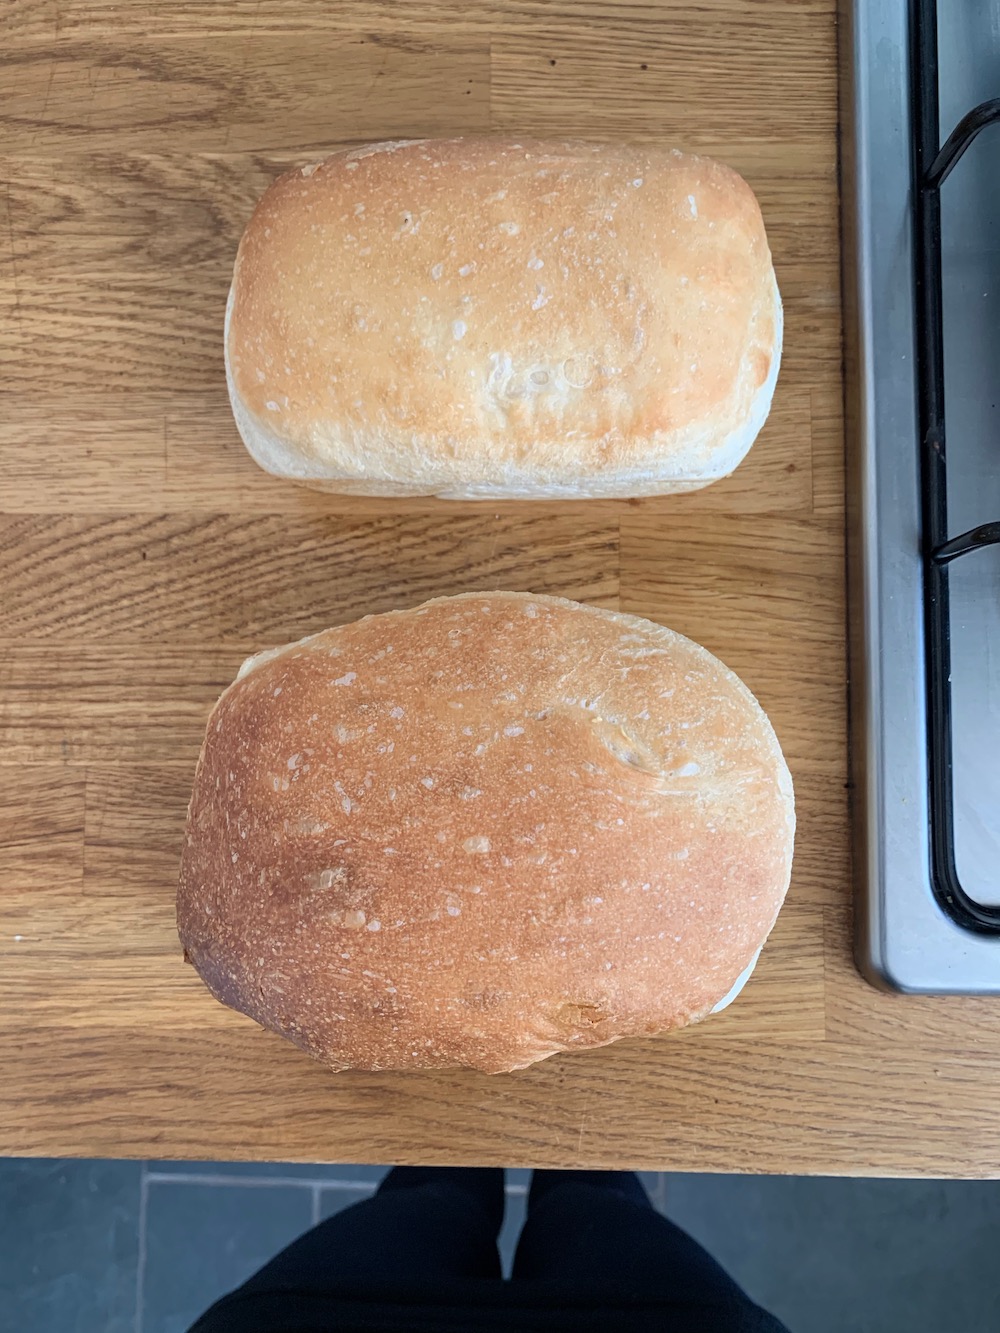
I place a plastic bag over the loaf tins and leave the dough to rise for about 90 minutes before putting it in the oven for about 20-25 minutes.
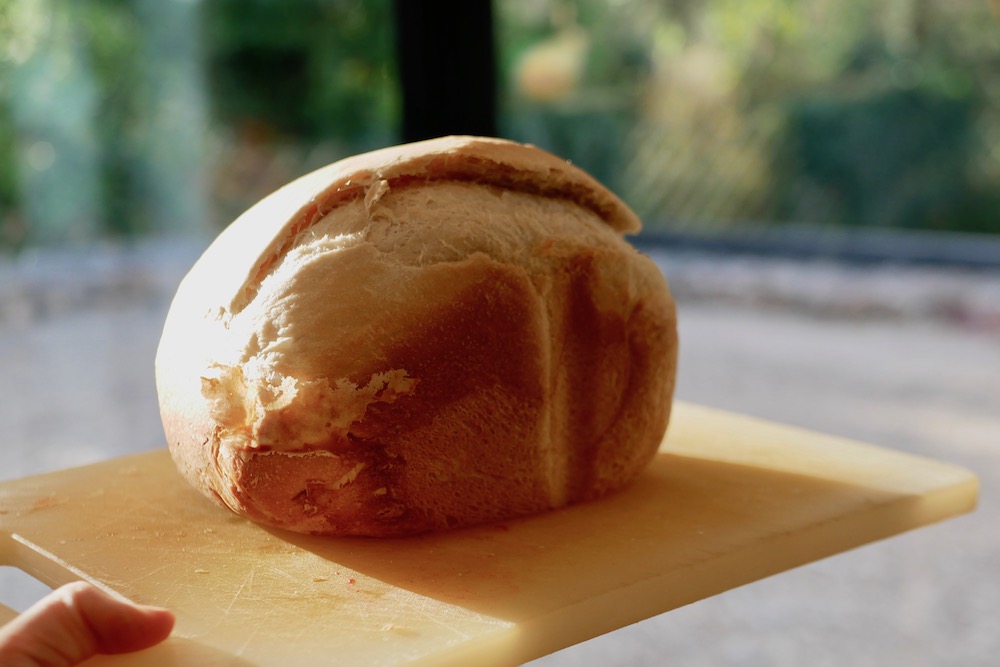
Having two small loaves suits my family best. I have three young children so plenty of afternoon snacks are a must! I usually make my bread to be ready at about 2pm so it’s ready for my kids when they finish school. We’ll eat one loaf immediately and have the other loaf for breakfast the following morning. Fresh bread doesn’t stay fresh for long so this is a really nice option if you’re not eating all the bread at once.
The Panasonic SD-ZB2512 is unpredictable
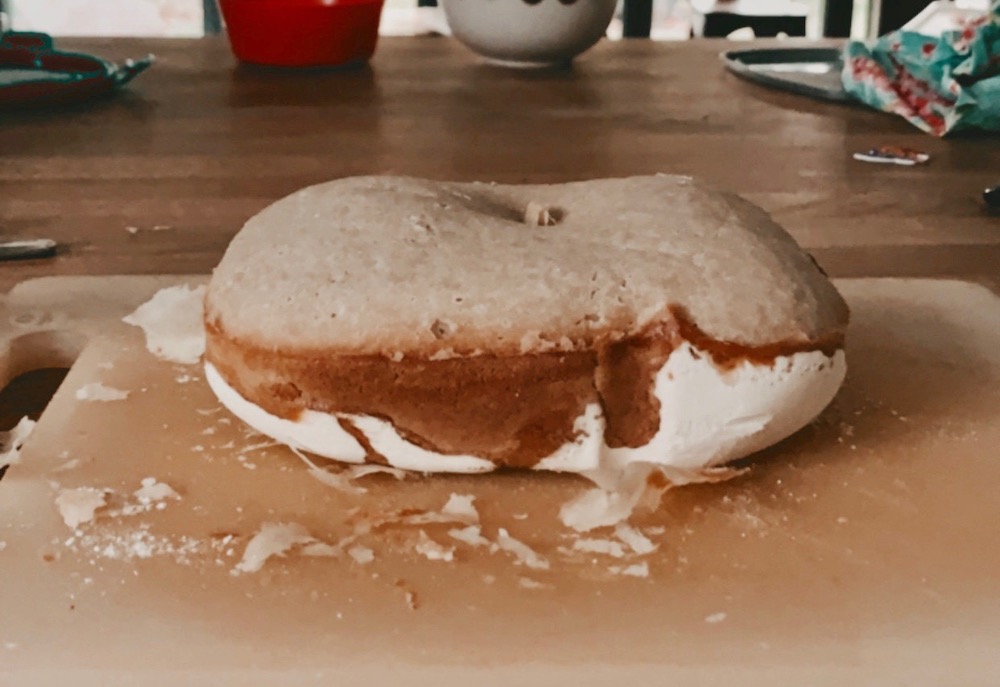
The reason I started using my bread maker to just make the dough was because after about 18 months the bread maker became unpredictable. Some days my bread was perfect and some days it didn’t rise properly and was soggy and undercooked. It was so disappointing to patiently wait for my bread for 4 hours and it would come soggy. I’d say 80% of the time it was perfect, 10% of the time it was fine but a bit too heavy and 10% of the time it was inedible.
I’m pretty sure I could have taken it back to John Lewis but we were in the middle of lockdown at this point and – to be totally honest – I couldn’t be bothered with the hassle.
I tried buying all new ingredients and different brands but 20% of the time it still wasn’t working.
I eventually realised it was to do with the yeast. I was buying a big 100g tin of yeast but it must have been going bad within a couple of weeks. So I switched to small sachets of yeast and I haven’t had a problem since!
You can still bulk buy yeast sachets for a good price and each sachet will last for about 4-5 loaves so that’s perfect as each one lasts about a week.

- Combination of dried yeast with the bread improver ascorbic acid
- Essential ingredient in bread making
- Easy to bake
Using your breadmaker for pizza dough
Yes, you can also make pizza dough in your breadmaker! We’ve actually only done it a couple of times but it was really nice.

What else can you use your bread maker for?
I’ll admit I’ve never tried to use my breadmaker for any of these things but can also use it to make:
Jams and compotes
Some cakes
Sourdough
Rustic doughs
Scones
Ciabatta
Brioche
Spelt bread
Gluten free bread
Fruit loaf
Cheesy breads
And there are loads of dough recipes to make things like croissants, buns, hot cross buns, teacakes, french sticks, pizza, focaccia etc.
Some things to be aware of when using your Panasonic bread maker
Remove your bread quickly
You really need to remove your bread from the bread maker as quickly as possible when it’s finished. If you leave it in the tin then your loaf will get soggy. It’s best to get it on a wire cooling rack as soon as it’s done. This isn’t a big deal but it does mean you can’t really go out around the time your bread is due to finish.
I’d imagined I’d set my bread to be finished baking at 6am, so it would be cooled and ready to eat by 7am when my family get up in the morning. I tried it once and the bread was cooled but it was also soggy and damp so I won’t be doing that again!

It takes a forceful wiggle to remove it from the tin
It takes a bit of force to get the bread out of the tin. The first time I used the breadmaker I assumed the bread was stuck so I used a knife to prise it from the side of the tin. I ended up scratching the tin and it didn’t remove the bread!
I now find that a good shake works best. It does come out a bit easier when the bread is slightly cooled but if you leave it too long then it’s going to get soggy.
I’m mentioning this because I think someone who is particularly frail might struggle to remove the bread from the tin.
You won’t save loads of money
One thing to be aware of is that using a bread maker isn’t the cheapest way to get your bread. It is slightly cheaper, especially if your breadmaker lasts a long time (but reading online reviews suggests they rarely last more than 3-5 years) but there’s a risk your bread maker won’t last.
- My bread maker cost £200.
- It’s about £1 for a bag of strong white bread flour and this will make about 4 medium sized loaves or about 8 of the mini ones I make.
- Dried yeast costs £1 and lasts ages and ages.
- Salted butter costs about £1.50 and will last about 10 medium loaves
- You need a teaspoon of salt and sugar too.
So it probably costs about £0.40p to make your own bread. Yes, it’s definitely a saving and definitely cheaper than a delicious fresh loaf from your local convenience store.
But if you’re considering buying a breadmaker purely to have the cheapest bread, then you’re probably better off sticking to the supermarket own brand at around £0.50.
I think the bread I make is nicer than the bread from my local co-op and I really like the convenience of not having to go to the shop – especially with three young children during the pandemic!
You can of course buy much cheaper bread makers. There’s a Morphy Richards bread maker for £60 which has great reviews on Amazon!
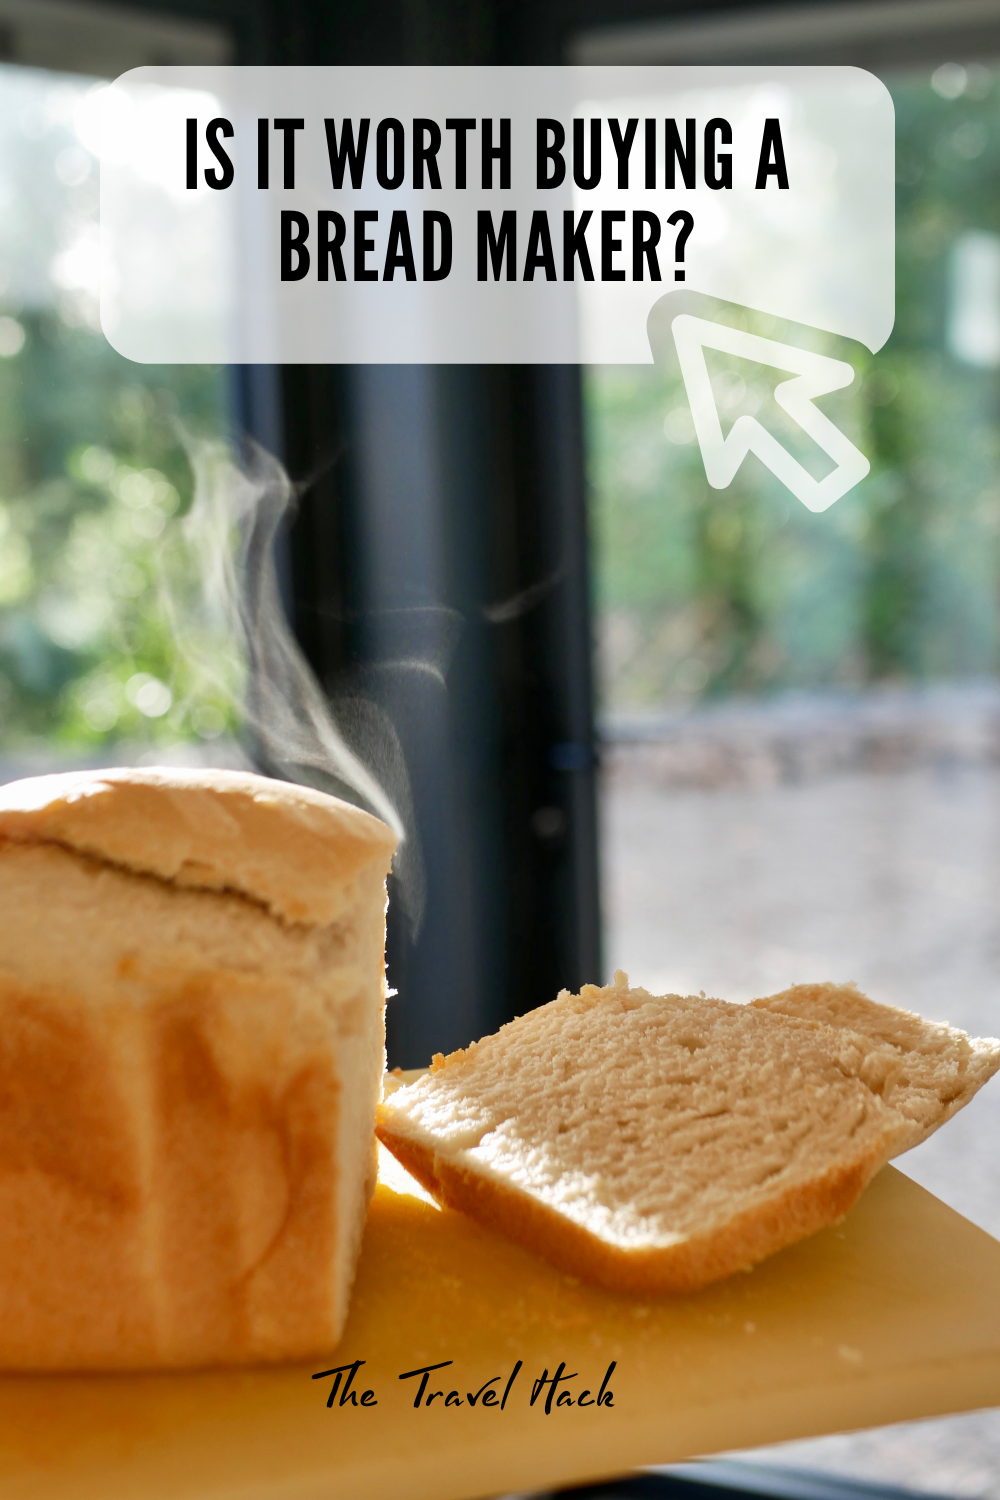
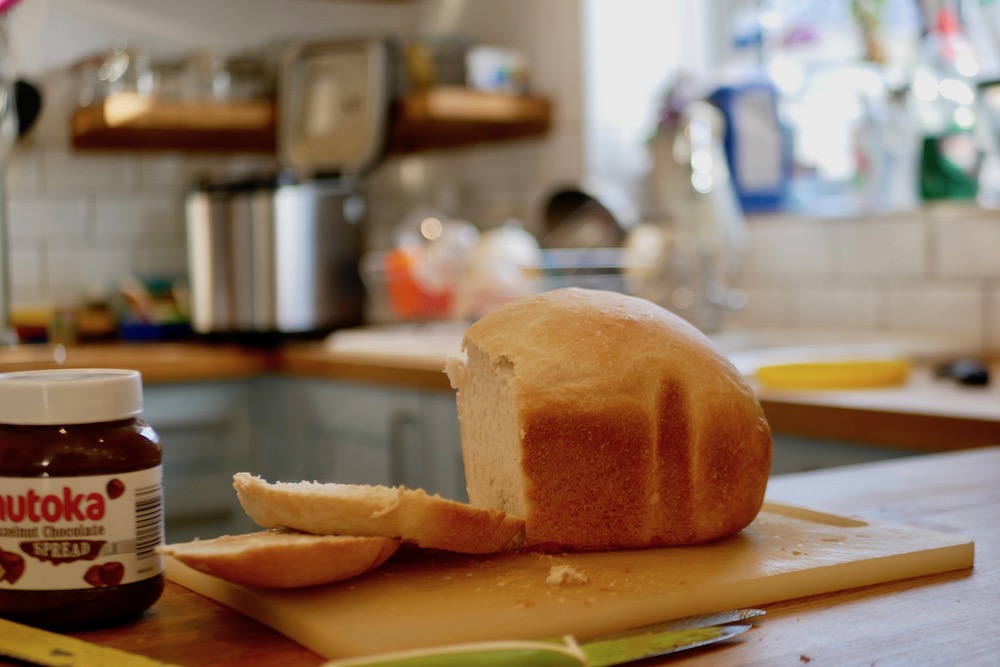
It makes me feel like Supermum
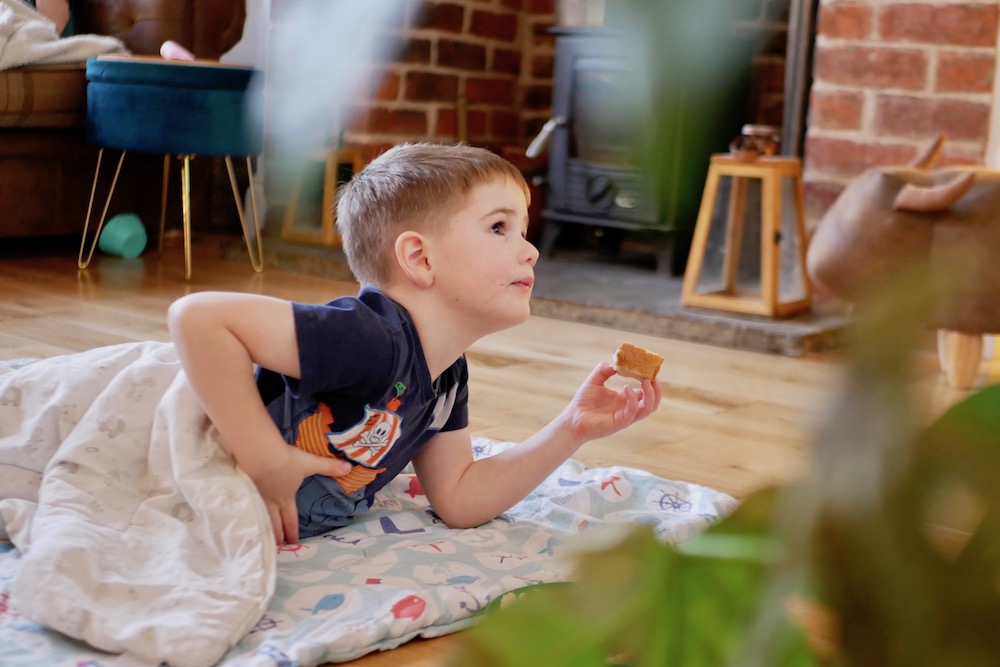
I’m not going to lie, baking fresh bread for when my kids come out of school makes me feel like Supermum. What kid wouldn’t want to come home from school to be greeted by fresh bread slathered in chocolate spread!? It makes a great afternoon snack for the whole family and makes the house smell incredible.
For more information about the bread makers I have mentioned, check out the reviews on Amazon to see what other people have said:
My Panasonic Bread Maker (£169)
Morphy Richards Fast Bake (£59)
- DUAL TEMPERATURE SENSORS: This breadmaker comes equipped with two built-in sensors to determine both internal and external temperatures to optimise each programme at every step, giving you the best...
- ARTISAN-STYLE KNEADING: This automatic breadmaker features an innovative kneading blade with specially placed ribs in the bread pan to replicate artisan kneading and serve you the best-tasting bread...
- FULLY AUTOMATIC: This breadmaker has both yeast and raisin/nut dispensers, which automatically add the ingredients at the right time, giving you consistently tasty bread with less work.


What a fantastic Bread maker my late husband bought me one 16 years ago. About a month it just stopped working. Would like to get another or have mine fixed. I live in South Africa.
I hope you manage to get it fixed or find a replacement Christine!
Thank you for your comment in the Panasonic Bread maker.I have had two in the we last ten years, and I would be absolutely lost without it. Making bread us a joy and I must admit having all the ingredients in one box is certainly a great idea, rather than moving from one cupboard to the next! My favourite breads are the loaves that you can add seeds via the dispenser and certainly match the shop bought seeded loaves, ( I cheated and made note of all the seeds that were in a shop bought loaf and replicated the seeds) I have found if you bake any loaf, if you put it on a timer, so that it has more proving time it does seem to allow it rise more, so worth noting. All in all a superb product and I dare anyone to beat this Panasonic Bread maker.
Thanks John! That’s good to know about putting it on a timer. I’ll give that a go because mine still doesn’t seem to allow enough time for proving.
I’ve had 3 and never had soggy bread. It’s certainly the case that the amount of liquid being wrong can cause problems, and that can be due to factors such as humidity or the type of flour. I always check during the kneading process.
Hi Mon…great blog. I love my Panasonic. I use 420gm of multigrain flour and put the setting on L as it seems to make a better loaf and diesnt use as much flour! Its important to put the yeast in first then the flour then all the other ingredients. I use 290 ml of water. I premix my dry ingredients except yeast and vac seal on bags ready to go….just add yeast, butter and water and bingo..ready to go. Ive had nothing but perfect leaves from the get go but I use the Lueke bread flour rather than white flour.
Cheers
Hi Nick. Oh this is interesting! So you add your yeast into the flour? I add the yeast into the compartment at the top but maybe I need to try this method! Thank you.
Spot on! Really good bread maker, have tried most of the options. Makes excellent Brioche.
Have now mastered Sourdough having found a really good item on Google, Mygreekdish.com, that clearly and comprehensively explains the process for this Panasonic machine. With a little experimenting and trial and error with flours and added ingredients, some interesting loaves can be made.
We’ve had our Panasonic for at least 12 years and use it at least twice a week for seeded wholemeal loaf and pizza dough. The only problem we have is that as the pan is now old the bread sticks when done, but ours came with a grooved spatula that you just slide down the grooves on the pan and this releases the bread. For vegans, I use one and a half tablespoons of rapeseed oil instead of butter. In fact this gives a nice flavour so I use it for my own loaves too!
Oh that’s good to know about the vegan loaf, thank you, I’ll give that a try!
My mother in law bought me my Panasonic in 1988. The old girl makes two loaves à week. I have never had a mechanical problem with it. She made a splendid loaf of gingerbread tonight for Christmas breakfast.
I have owned and regularly used my Panasonic SD253 breadmaker for 20 or so years. We love it so much we recently bought a nearly new one from a charity shop the other day for only £25!!!
I couldn’t believe it was the same model! Another throwaway from a lockdown hobby perhaps???
We have made fruit breads, dough for rolls and pizza and all sorts of daily bread. It doesn’t save us money because we eat thicker slices because it’s so yummy……I like knowing what goes into my bread and it is a healthier option than many supermarket loaves……all flours and fats not being equal…..
It does matter whether you measure your ingredients carefully or not, as an imbalance in sugar, salt and yeast ratio can be disastrous.
When cooked we turn the bread upside down and just shake it and it comes out easily. Unless any of the non stick coating has been scratched off the paddle…..then it’s not so easy!
You can’t be serious? A fifty pence white loaf contains about 14 ingredients ,one of them solely to make the flour absorb more water. Disgusting pap that you wouldn’t feed to a dead dog.
A solid investment worth every Penny.
I have a Panasonic SD-200. I don’t know how old it is, however, given that I think we bought it a couple of years after buying our first house in 1984… and we’ve since moved into a new house, new town, and it’s 2022, we’re still using the same breadmaker! The only thing we’ve had to replace in all that time was the kneading paddle! However, it is limited to bread and it makes vertical loaves which are a bit awkward to slice. Unfortunately given its age, sour-dough really wasn’t an option, they don’t have a suitable paddle (nor can you get one) and I don’t think the motor was quite strong enough for sourdough, not sure. (I did contact Panasonic to ask.)
But as of this date, I’ve upgraded to a new breadmaker, still Panasonic. I subscribe to Choice Magazine Australia, a consumer products group that tests and reviews all sorts of things from white goods to laundry detergents and they’d recently done a review in December 2021 on the latest breadmakers. They give all the pros and cons and the Panasonic was at the top of the list. So I did a little looking around and worked out where I could buy one, (one or two hours travel) but then discovered my local electrical store (we’re in a little country town so it doesn’t stock a huge range) had one on their shelf (and one still in the box out the back!) So… now I’ve upgraded. I won’t ditch the old one yet and perhaps when I get a chance to visit my son and his gf, I’ll deliver the old one to him. He’s more likely to use it mostly for the dough preparation side (he’s always made his own pizza bases by hand.)
You’re right, some people love them, some don’t use them much. I loved waking in the morning to the smell of bread baking and that beep when it was done, kind of like an alarm clock really, you have to get up and get it out, otherwise it sweats.
So I’m really, really looking forward to experimenting with the new breadmaker and having many, many more options to choose from.
Finally, many years ago, I bought a recipe book for Breadmaking Machines. It’s Australian, published by Five Mile Press and it’s called Hot Bread! The Breakmaking Book for Breadmaking Machines. (Published 1998) And I’ve made a few recipes out of it and they’re amazing. They have all the pros and cons, troubleshooting and hints. And I have to say my favourite recipe is the Caramel & Butterscotch Brittle Pull-aparts.
Finally, as somebody else mentioned with the yeast. The old Panasonic didn’t have a dispenser. I use the Laucke bread flour (I always use flour specifically for bread making) and get the multigrain. Sometimes I add extra grains. In the old breadmakers, you usually followed the order of adding ingredients. Some had water first, some last. With multigrain, I would put my water in first, then my flour and finally the yeast on top, that way, while it ‘rested’ before starting the kneading process, the flour would start to absorb the water a bit and it helps soften the grain, apparently. (Great for overnight) It’s always worked for me.
Sorry for such a long post. Kind of obvious I love my breadmaker? lol
I also have an elderly Panasonic much used. It reliably makes well risen seeded wholemeal bread. But
recently my occasional white loaves have been an unrisen disaster (they used to be super-tall). Just like the first pic in your post. Any thoughts? Happy baking – Sheila
For me it was my yeast. When I buy a fresh box of sachet yeast it instantly fixes my problem! I hope that works for you.
Hi Supermom,
With my health problems I cannot buy supermarket bread anymore.
Just recently I’ve discovered the amount of rubbish manufacturers put in supermarket bought bread, unbelievable!
I’ve decided to chance it and get a premium model. Hopefully I could get one on offer or cheaper if I go to some comparison sites.?
I’ve just been given one and it’s 25 years old! It’s also a Panasonic, and from your photos it doesn’t seem to have changed a lot in that time. I’m yet to use it as I only got it unpacked yesterday, but the recipes look great. I’m going to use it for some non-yeast breads, too, using the fast-bake setting.
The instructions for mine says to lay the loaf on its side for slicing, so you don’t end up with long slices.
Your recipe does not have sufficient sugar. A 400 gram loaf requires 1 tablespoon of sugar, not a teaspoon. Also keep yeast in fridge once opened and use a yeast improver.
I’ve always added 1 teaspoon and it’s enough. I think maybe it depends where you live as different countries might have sweeter bread than others? but here in the UK, that 1 teaspoon is definitely enough!
@Monica, my Panasonic SD253 recipe book does state a tablespoon of sugar for most basic breads. That said, we’re trying to reduce our sugar intake so I use slightly less without any obvious differences to the final result. Interesting that it works with one teaspoon. I’m not sure if it’s supposed to be a sweetener, rather that some sugar is needed for the yeast to feed on, and help to get the process going more quickly. I’ll try with a teaspoon and see what difference it makes to the consistency of the bread.
Our Panasonic bread maker is about 25-30 years old, bought it in the 90’s and we use it twice a week. I use spelt flour on a longer, 5 hour cycle, the breads are always nice and high, above the rim of the bucket. Recently the shaft in the bucket started playing up, hard to turn. I found the original part online for AU$49, has not arrived yet, but it looks like the bucket stayed the same all these years. Hope we can get more years of use out of it. It was quite expensive back then, around $300 as I remember, but it worked hard all these years as we love bread, including my grandkids now.
I hope the new part works for you. Sounds like your breadmaker is part of the family now!
@Stefan, I have found that the spindle the paddle sits on sometimes needs piling. I do this from underneath, just a single drop until you can spin the paddle freely. Hope this helps.
I enjoyed reading your blog. I have a Panasonic SD253 bread maker, it was a birthday gift 17 years ago and it’s still making good bread. I make 1 loaf every week. It has lasted so long but recently I damaged the paddle when slicing with an electric knife I forgot to take out the paddle. I am thinking of replacing the machine now with another Panasonic.
You are right about the yeast, it needs to be fresh,I keep my yeast tin in the fridge.
A tip about getting the loaf out – I rest my loaf on its side in the tin for about 3 or 4 minutes before tipping it out. During this time I wiggle the paddle a little from the underneath, this usually loosens the bread from the paddle (use an oven mitt as it’s very hot) this works 90% of the time.
Happy baking
Great Review. (though i guess this was probably before some of the big energy crisis price rises) i know you said you dont think its much of a saving. but its not compairing apples with apples.im goung to make a sourdough bread which wont cost me much more than the cost of of the flour. in M&S a sourdough loaf is £4 and i think between £2 and £4 is your compare point not the cheapest supermarket bread full of chemicals to keep it soft. I mean i esimate you can make a fab fruitloaf for about 90p (aldi strong bread flour and raisins) also you can save by using oil instead of expensive butter and the results are pretty much the same.
i have the panasonic too and it just works. i was lucky to get a big box of individual yeast packets super cheap and agree these are much better. Just made a pecan and maple loaf which was fab too. I
Yes I agree, it wouldn’t be fair to compare a cheap loaf of bread with a nice, fresh loaf from the bakery. This is definitely more of a bakery loaf! And much more convenient because I don’t need to go to the bakery!
And that pecan and maple loaf sounds delicious, perfect for autumn.
I got a Panasonic Bread maker from my dear friend as a gift for my wedding, which was nearly 20 years ago. It’s still going strong and makes delicious bread, bread roll dough, etc.
I’m taking good care of it. I’ve brought it along with me from South Africa, now here, in Australia. Thank you Panasonic!!!